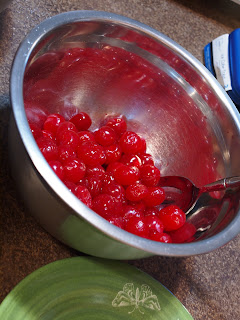
It all started with the idea to repeat our chocolate-covered cherries from last year. We had received rave reviews and they were easy to make. Plus, I'm a fan of making edibles that have an aesthetic element to them.
So we elected to do a double batch and spent a little over $6 dollars on maraschino cherries and powered sugar at Aldi's. The first step was to drain the little guys on paper towels for an hour. With no paper towels on hand, I simply put them out on a jelly roll to dry. Little did I know I had just committed the first of a series of fatal errors.
Once drained, I started on the fondant. You mix powdered sugar, a little corn syrup, and butter together ...
And it turns into this ...
If you weren't aware, this fondant is what liquifies around the cherry and under the chocolate layer. That's why you get that lovely layer of liquid and cream. The cherries actually have to sit for about 2 weeks to reach this stage.
Once the fondant is ready, you measure 1/2 tsp of the mixture and flatten it out so it can be formed around the cherry.
With the two of us tackling the process, it took just over an hour to complete 120 cherries (we elected for a double batch). Then they sat in the fridge to chill for 60 minutes.
 |
| Little did we know evidence of problems to come were already visible in this photo |
We soon discovered melted chocolate chips don't coat as nicely as candy coating (which should seem obvious ...). The chocolate globbed excessively to the cherries. I tried to minimize this by using forks to roll them. Some of the cherries started to look promising, despite mounting frustrations with the chocolate.
But then we noticed that cherry juice was leaking out of the fondant. Even though they had been well sealed, the fondant was starting to pull away from the cherry itself and was sticking to the wax paper.
This, we learned, is why you MUST dry the cherries on paper towels. The excess juice won't allow the fondant to adhere to the cherry. The weight of the chocolate ends up pulling the already-compromised fondant completely off the cherry. Resulting in these fugly creations.
As we got down to the end of the batch, I noticed my chocolate starting to seize. Knowing full well that water is death to melted chocolate, I threw in a little butter. Guess what? It turns out Walmart brand butter has a high water content - seized the whole thing up the second it hit the bowl. Good thing there was only a small bit of chocolate left, so not much was wasted, but still irritating.
Upon examining the "good" cherries, we noticed yet another problem - the melted chocolate chips only partially coated the cherries. You need a perfect seal for this candy and here we had over 100 candies with little fissures and pock marks.
At this point, now late into the evening and tired of standing in front of the stove, I may have said f*** it and put the poor candies in a tupperware container, hoping that the seal was just good enough to work.
Nope. Several days later, we knew we had a lost cause on our hands.
Not only were the lovely innards leaking out everywhere, but the chocolate never hardened, causing further mayhem.
Are these little guys edible? Yes, with a spoon. Will they be eaten regardless at a family event? Yes. Will we be giving them as gifts? NO.
Lessons learned:
- Do not deviate from a candy recipe. Either follow it to a T or substitute another recipe.
- Not all butters are created equal. The ingredients on butter should say "cream, salt." I assumed that the different brands I was using were the same (HyVee, Aldi, Walmart). If you see "natural flavorings" in the ingredients, run for the hills.
- If you are taking the time to create something for a gift, take the time to do it right and don't get cocky. Just because something was easy the first time doesn't guarantee you'll get the same results the second.
Did you have an DYI holiday projects go belly up too?


Sorry your cherries didn't turn out right but it made for an entertaining post!
ReplyDelete